This section gives a simple example on how to use the Direct Assembler to debug and change existing code. For all details please see section Direct Assembler.
For this example we will use a small Studio II game written in 1802 code.
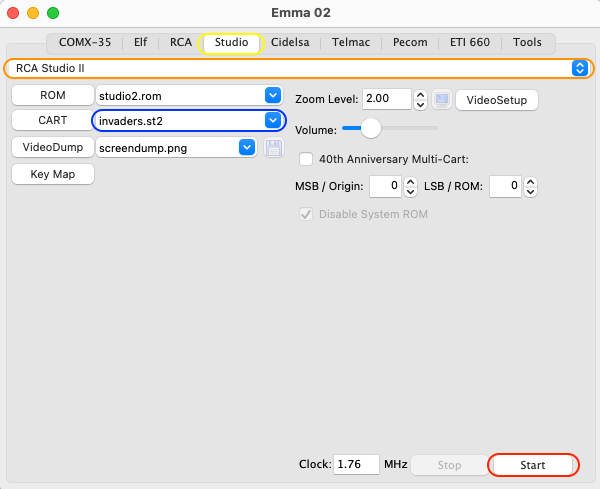
First set up the Studio II emulator with the Space Invaders game:
A Studio II running Space Invaders should start. Make sure to play the game a bit so most code gets executed. So move to all directions, shoot some invaders and get killed yourself. Default the keys are mapped as follows:
Left: arrow left (4 on keyboard A)
Right: arrow right (6 on keyboard A)
Fire: space (0 on keyboard B)
Restart: 0 or tab (0 on keyboard A)
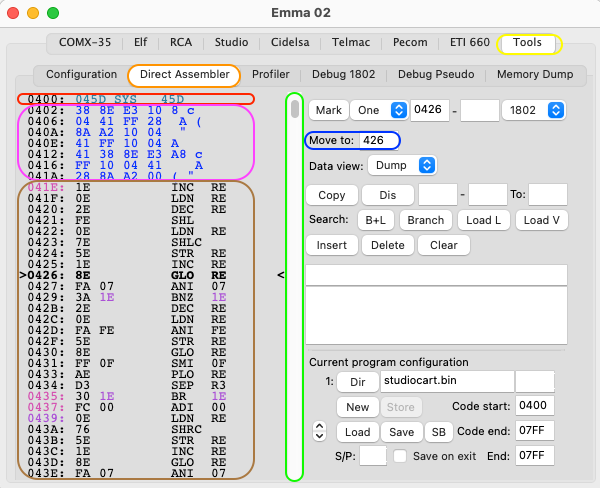
Select the 'Tools' tab (yellow ellipse) and then select the 'Direct Assembler' tab (highlighted in orange), this should show the direct assembler GUI. Now change address to show address 400 and onwards by using the 'Move to:' field (highlighted in blue) and/or the slider (highlighted in green). Address hex 0400 is the start address of all Studio II software. This address will show an ST2 instruction SYS 45D (highlighted in red) in steel blue , which is a call to an 1802 code routine at address 045D. From address 0402 to 041D (highlighted in purple) data bytes should be shown in blue. After that from 041E and onwards (highlighted in brown) 1802 code should be shown in black.
The Space Invaders game runs somewhere from 0400 to 07FF, so now do a manual walk thru of the code from the current address to 0800. Easiest is to use 'SHIFT arrow down' which will go one page down on every press. What you need to look out for is if all 'code' is shown as 1802 code in 'black/orange' text and 'data' is shown in blue.
Have a closer look at all blue text as that is code or data which has not been executed by the emulator. So either it is data or maybe the code isn't execute for some reason.
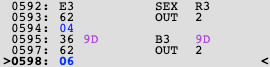
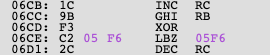
The following areas will probably show up in blue, possibly even more or less depending on how long you play/run the game:

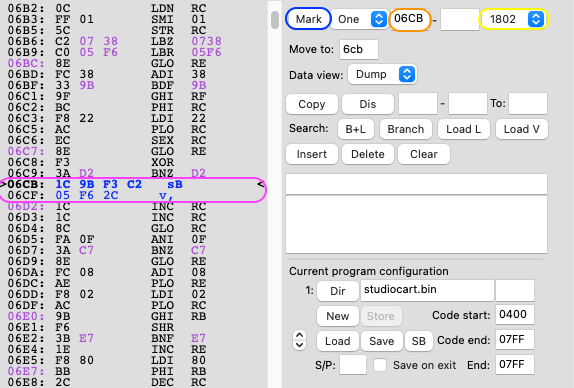
To manually correct this part of the code first make sure mark type is set as 1802 (yellow ellipse) and 6CB is selected as address (highlighted in orange). Now press the 'Mark' button (highlighted in blue) for every address. See also section Changing Address Usage. This should result in:
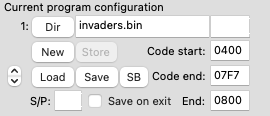
Now we are ready to save the program configuration including all debug information as just collected. To do this first press 'New' then fill in a file name, e.g. invaders.bin, code start = 0400, code end 07F7, end: 0800 and press Store. You should have the following configuration:
Press 'Save' and give the configuration a name, e.g. invaders.config.
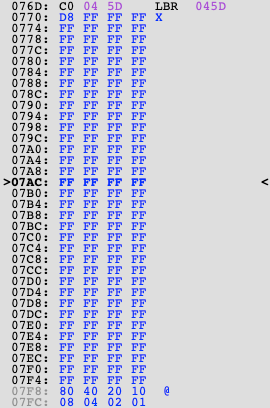
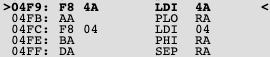
The reason why we took 07F7 as code end is because it looks like there is a table from 07F8 to 07FF. So not part of the code as such but it still needs to be saved so 'end' marks 0800 so 0400 to 0800 will be saved.
Before we make any changes to the code we do need to check if there is any code that is location specific. I did the following:
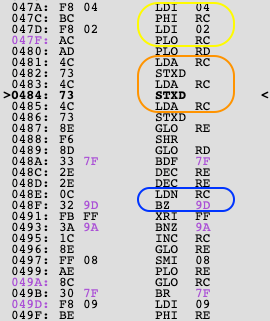
Conclusion is that we can safely 'Mark' 047A as an LDL instruction (Select 'LDL' instead of '1802' and press 'Mark'), resulting in:


So this we need to replace this with an LDRL A,044A as the code first loads RA.0 and then RA.1 (Select 'LDRL' instead of '1802' and press 'Mark'), resulting in:

After this I also printed 0400 to 0800 to a disassembly file (via 'Dis', see Disassembler) and searched for all SEP instructions. To make sure all were covered. I didn't find anymore.
Now there are some possible 'data' locations left:
That's it!
In theory it should now be possible to 'insert' a byte anywhere between 041E and 07F7 and the code should still run fine. I did a few inserts on 041E and managed to play the game. Note that giving an insert will give a 'Memory warning', to get rid of that fill memory from 0770 to 07F7 with '0' as the Direct Assembler only uses that value as 'not used memory'.
Now this code could be moved, adapted and even ported to another computer (e.g. an Elf) fairly easy.