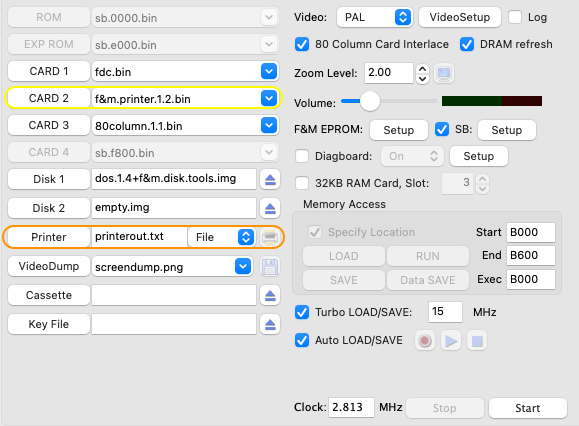
To run the COMX emulator with COMX PL-80 Plotter simulation select f&m.printer.1.2.bin or printer.bin in any available slot (CARD 1 if no expansion box is used), see example below (yellow ellipse):
For details on configuring other printer types, see Parallel Printer Support, Serial Printer Support and Thermal Printer Support.
To send all plot commands to a file select 'File' in the selection box next to the printer output file name (orange ellipse). When a 'printer on' command is send with a CARD P3 (if an expansion box is configured) or a CALL (@C070) a plot file is created (as specified in the orange ellipse). If the indicated plot file already exists a new file is created with the next sequence number. E.g. if the plot file is 'printerout.txt', this file is used the first time, after a CARD P1 (printer off) and a CARD P3 (printer on) the file printerout.1.txt' will be created.
From the COMX Emulator activate the PL-80 Plotter via the parallel printer commands (see also Parallel Printer Support) or load a '.comx' file from the Plotter directory to start a demo program.
To plot to an output screen and/or to a real printer, first select 'Plot' (orange ellipse):

After this send a 'printer on' command from the COMX or open the plotter output screen manually. A 'printer on' command from the COMX can be done with a CARD P3 (if an expansion box is configured) or a CALL (@C070). To open the output screen manually, press the F4 button or the printer icon (blue ellipse) before giving printer commands from the COMX.

When the plotter output screen opens, the print, preview and setup buttons will be disabled. When the COMX is ready with the drawing and a CARD P1 or CALL (@C050) is given these buttons will be enabled (yellow ellipse). After this it is possible to use the print button to send the plotter output to a real printer, use preview and/or change printer settings.
To start a new drawing close the plotter output screen. After this a new plotter window will be created when the COMX starts the first output to the plotter.
The plotter system ROM file can be changed via the controls in the orange ellipse and the character ROM file via the controls in the blue ellipse.
From the COMX Emulator activate the PL-80 Plotter via the parallel printer commands (see also Parallel Printer Support) or load a '.comx' file from the Plotter directory to start a demo program.
It is possible to disable the COMX status LEDs by clicking one of the LEDs, a red cross shows the LEDs are disabled (yellow ellipse). This will speed up printout especially when using higher CPU speeds.

The installation includes a plotter system rom file (pl80.bin) with the original character font set, as well as 2 additional font ROMs: Italic, Emphasized and Outline (pl80.it.em.ou.bin) and Tiny (pl80.tiny.bin). The first font rom also includes 2 sets designed for use with MSX computers. To access the fonts use code '12' and character set:
0. Original PL-80 Pica font (character 32 to 255)
With the italic font rom selected:
1. Italic font
2. Emphasized font
3. Outline font
4. MSX font (character 1 to 31, by adding 32)
5. MSX font (character 32 to 255)
With the tiny font rom selected:
1. Tiny font
An example is also included to print the different character sets, see the file 'Fonts.comx' in the 'Comx/Plotter' directory.
For additional PL-80 commands please have a look in the PL-80 folder on the Dutch COMX Club.